

Studio walkthrough
This page walks through one complete example: adding a video, asking a question about it, and following the answer back to the moments it cites. The sections after it cover the rest of Studio.
You need a running Studio connected to an engine. If you don’t have one yet, start with Studio setup.
The layout
Section titled “The layout”Studio has three areas:
- The sidebar on the left: New chat, your chat history, and your user menu.
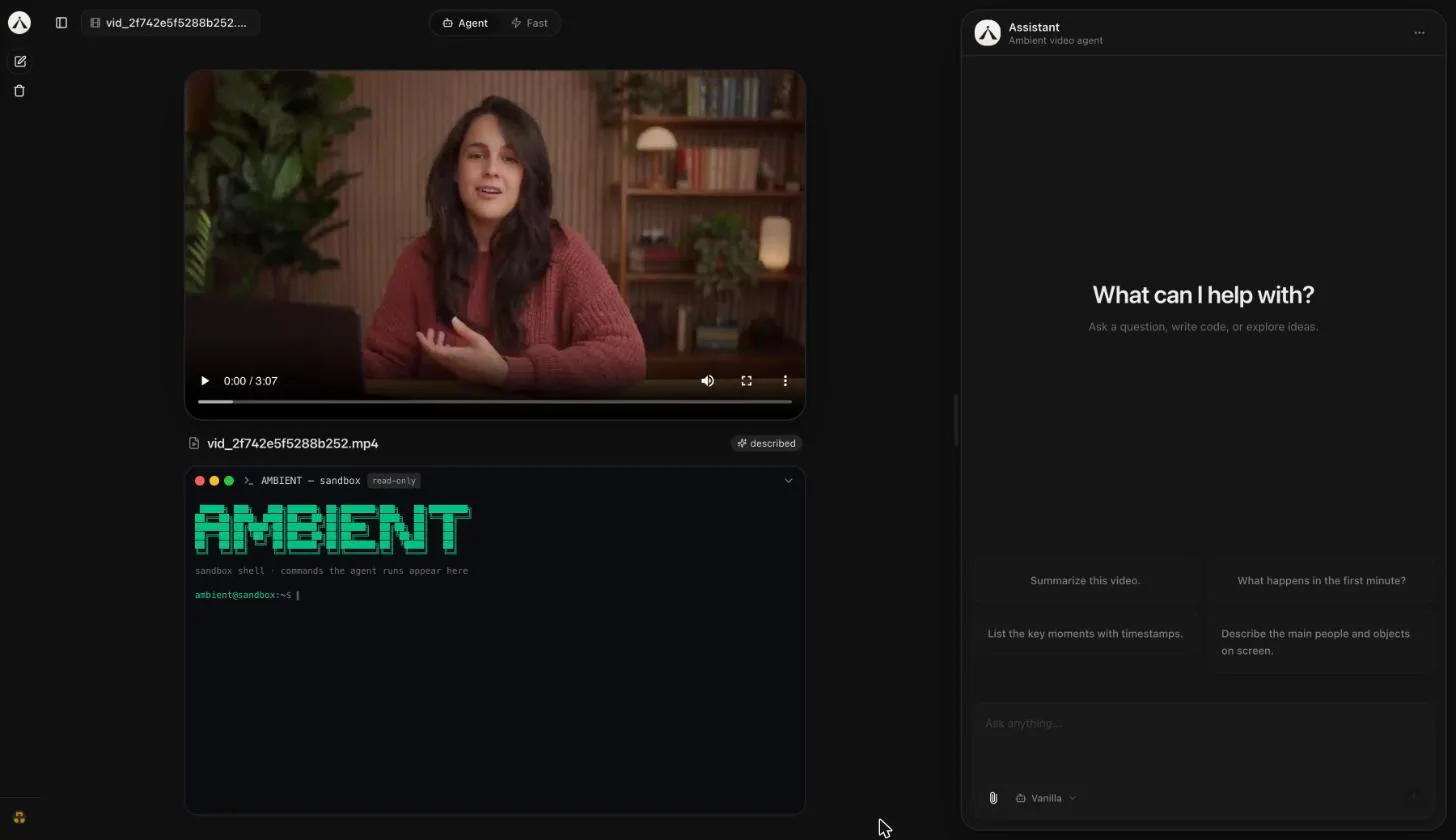
- The stage in the middle: the video player, with the sandbox terminal under it. Above it, the header holds the video picker and the Agent / Fast toggle.
- The Assistant panel on the right: the conversation and the question box. Drag the grip on its left edge to make it wider or narrower. Studio remembers the width.
Ask a question about a video
Section titled “Ask a question about a video”-
Start a new chat.
Click New chat in the sidebar. Every new chat opens on the Add a video to get started stage.
-
Choose a mode.
The toggle at the top of the stage sets how the engine works on this chat:
- Agent (thorough) digs into clips and frames with tools. It’s slower, but precise: timestamps, counts, exports.
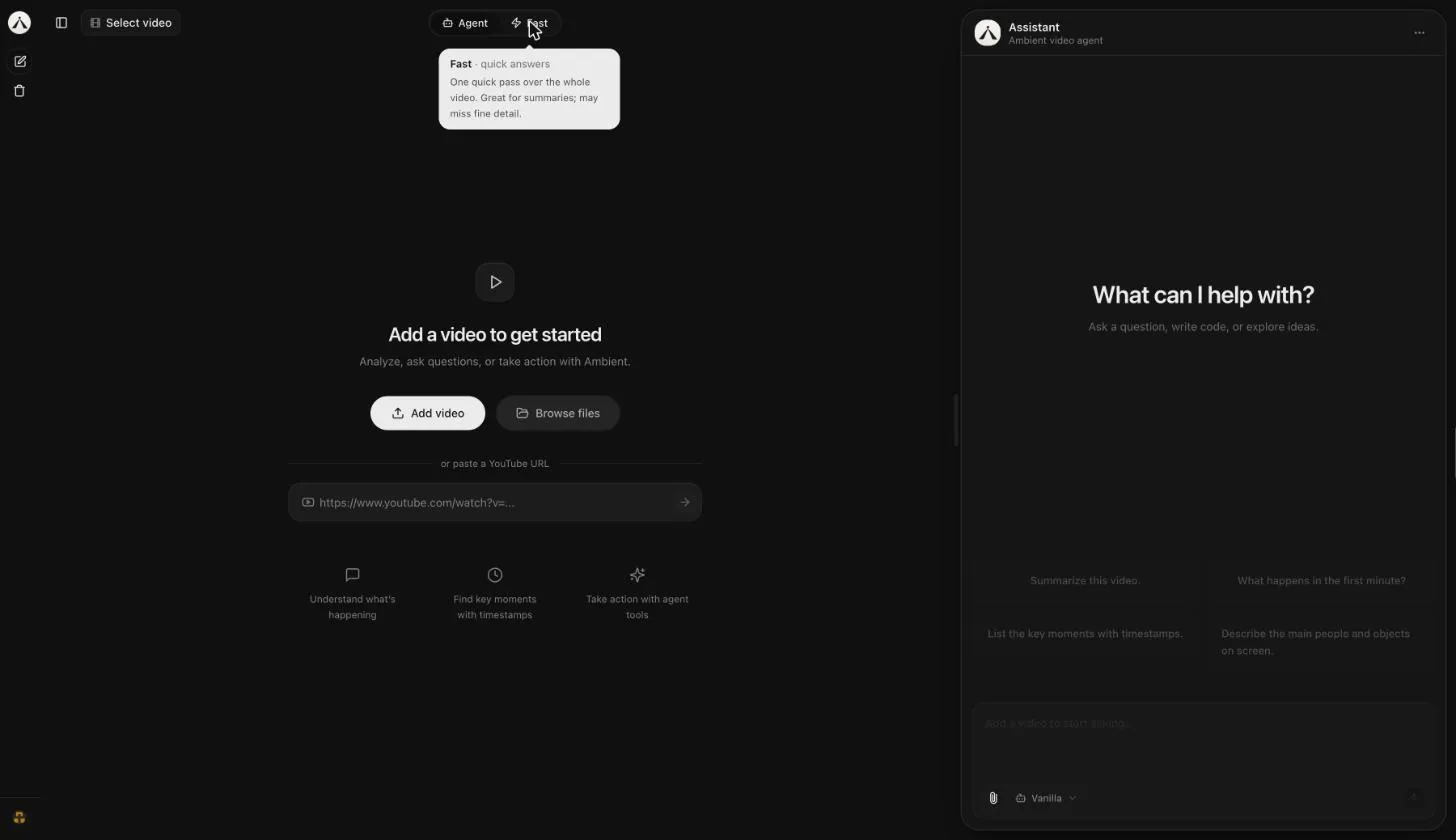
- Fast (quick answers) makes one quick pass over the whole video. It’s good for summaries but may miss fine detail.
Keep Agent for this example. The mode is fixed when the chat sends its first question.
-
Add a video. Pick one of these:
- Click Add video and choose a file, or drop a video file anywhere on the stage. The button shows Uploading N%, then Preparing….
- Click Browse files to reuse a video that’s already in the engine. See The video library.
- Paste a YouTube link into the or paste a YouTube URL field and press the arrow button. The player shows Importing from YouTube… while the engine downloads it.
-
Look over the stage.
When the video is ready, it takes over the stage. The filename shows in the title row and in the header’s video picker. Once the engine has described the video, a described badge appears next to the title.
The question box on the right is now enabled, and four suggested questions appear above it.
-
Ask a question.
Type a question in the Ask anything… box and press Enter, or click a suggested question. For this example, click List the key moments with timestamps.
The chat now has its own address,
/chat/<id>, and appears in the sidebar. -
Watch the agent work.
The answer builds up in the Assistant panel as the engine streams it:
- Status lines. While the engine is between steps, a shimmering line shows what’s happening, such as Waiting… or Thinking…, or a playful filler like Scrubbing the timeline….
- Thinking blocks. Each step’s reasoning streams into its own block. When the step finishes, the block collapses to Thought for N seconds. Click it to read the reasoning again.
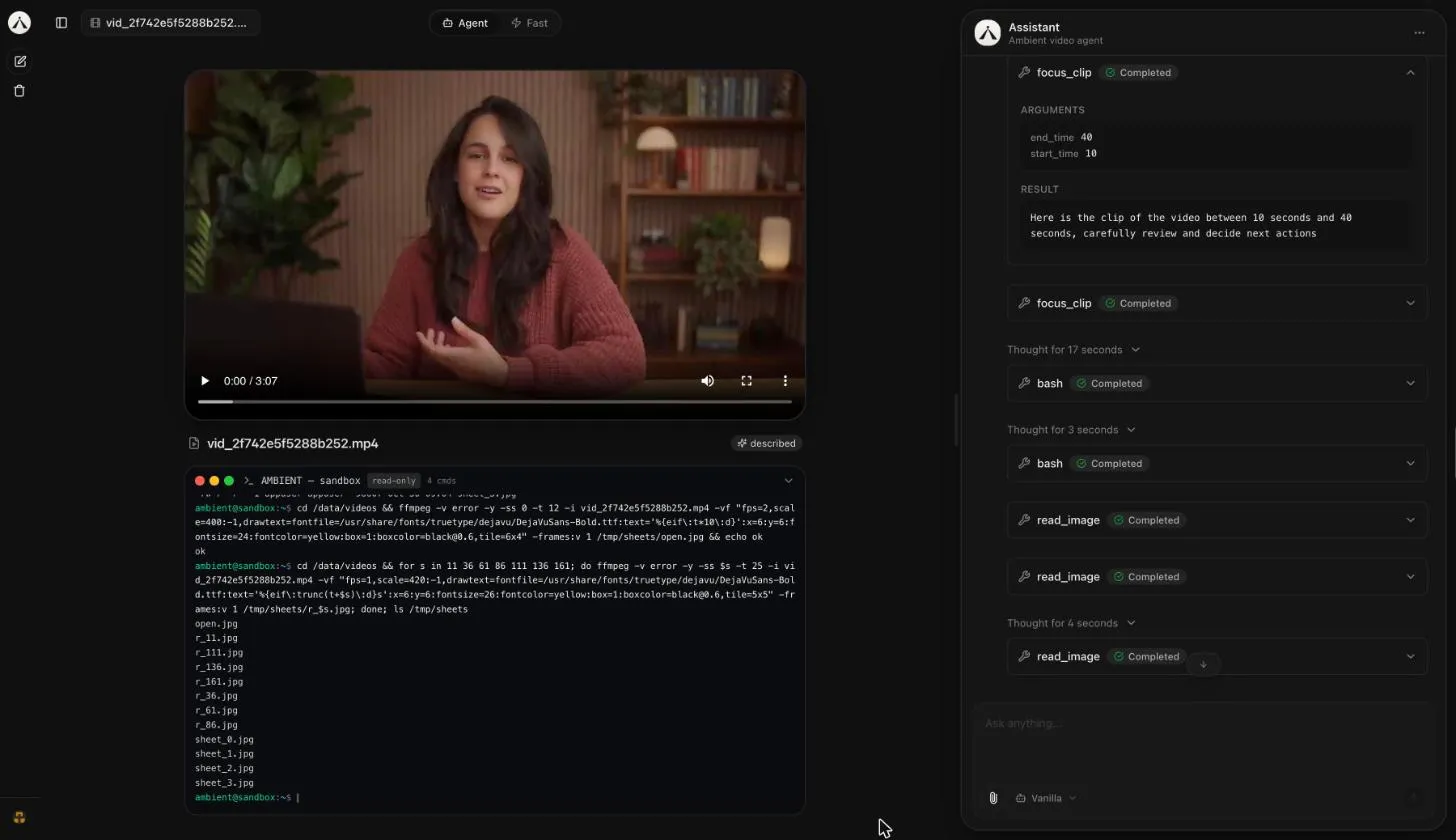
- Tool calls. Each tool the agent runs appears as a card with the tool’s name, such as
focus_clip, and a status badge: Pending, Running, Completed, or Error. Which tools you see depends on the engine’s model and settings. - Sandbox commands. If the agent runs shell commands, they show up live in the terminal under the player. See The sandbox terminal.
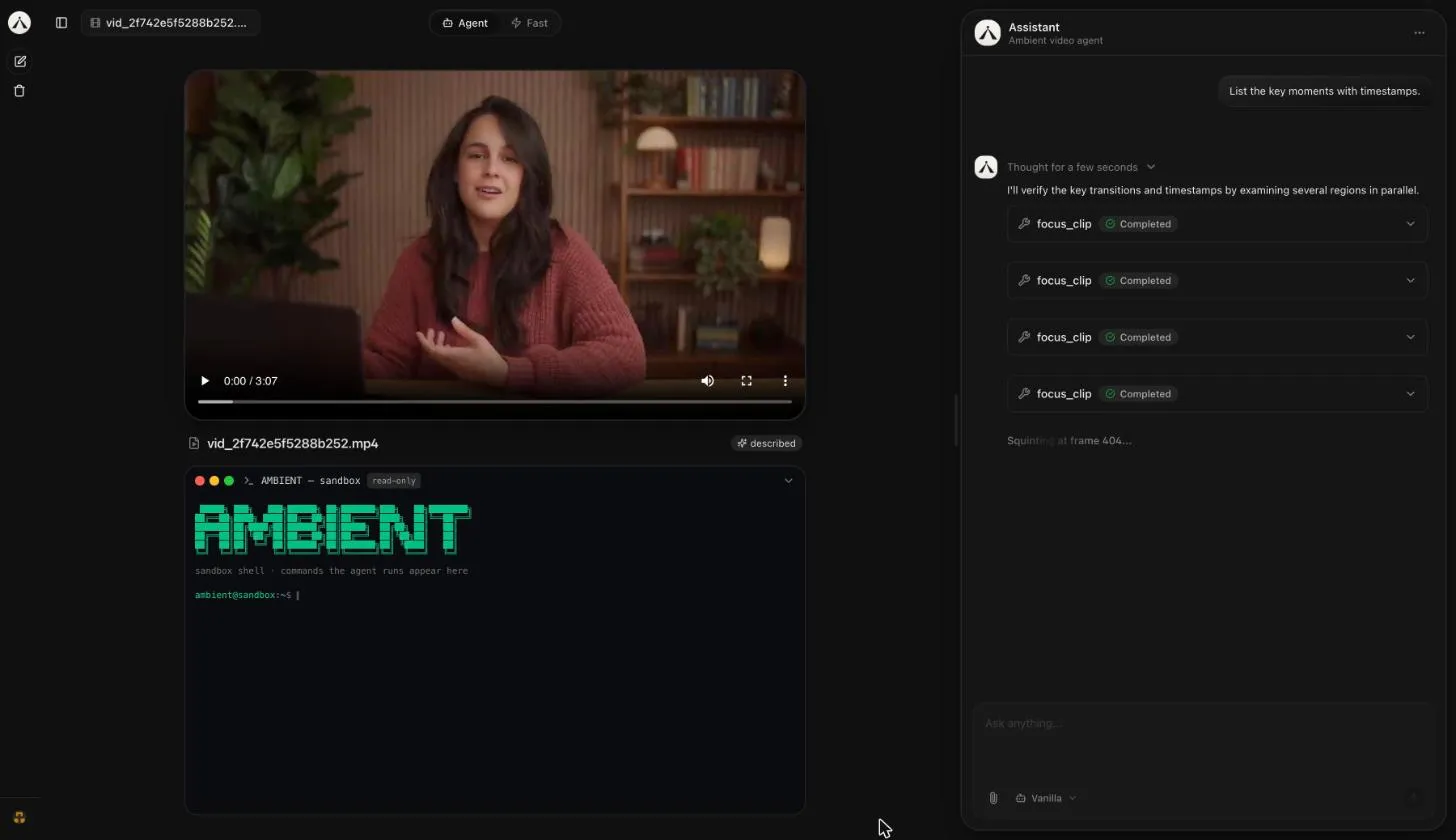
Click a tool card to expand it. Arguments lists what the agent passed to the tool, such as the start and end times of the clip it looked at. Result shows what the tool returned.
-
Jump to the moments it cites.
In the answer, every timestamp (
1:05,01:02:30, or “12 seconds”) is a highlighted chip. Click one: the player seeks to that moment, starts playing, and briefly flashes a ring around the video so you can see what changed.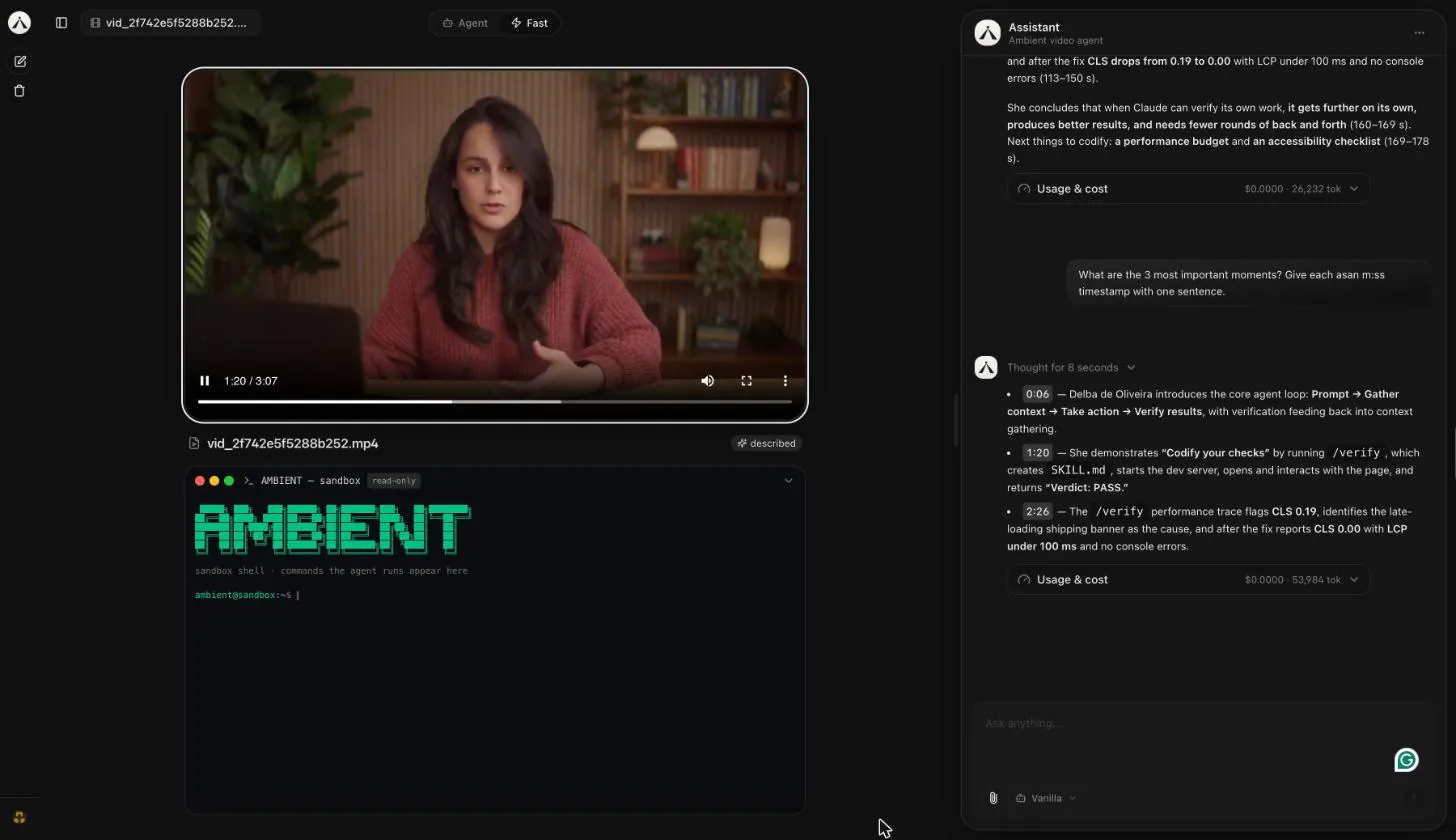
-
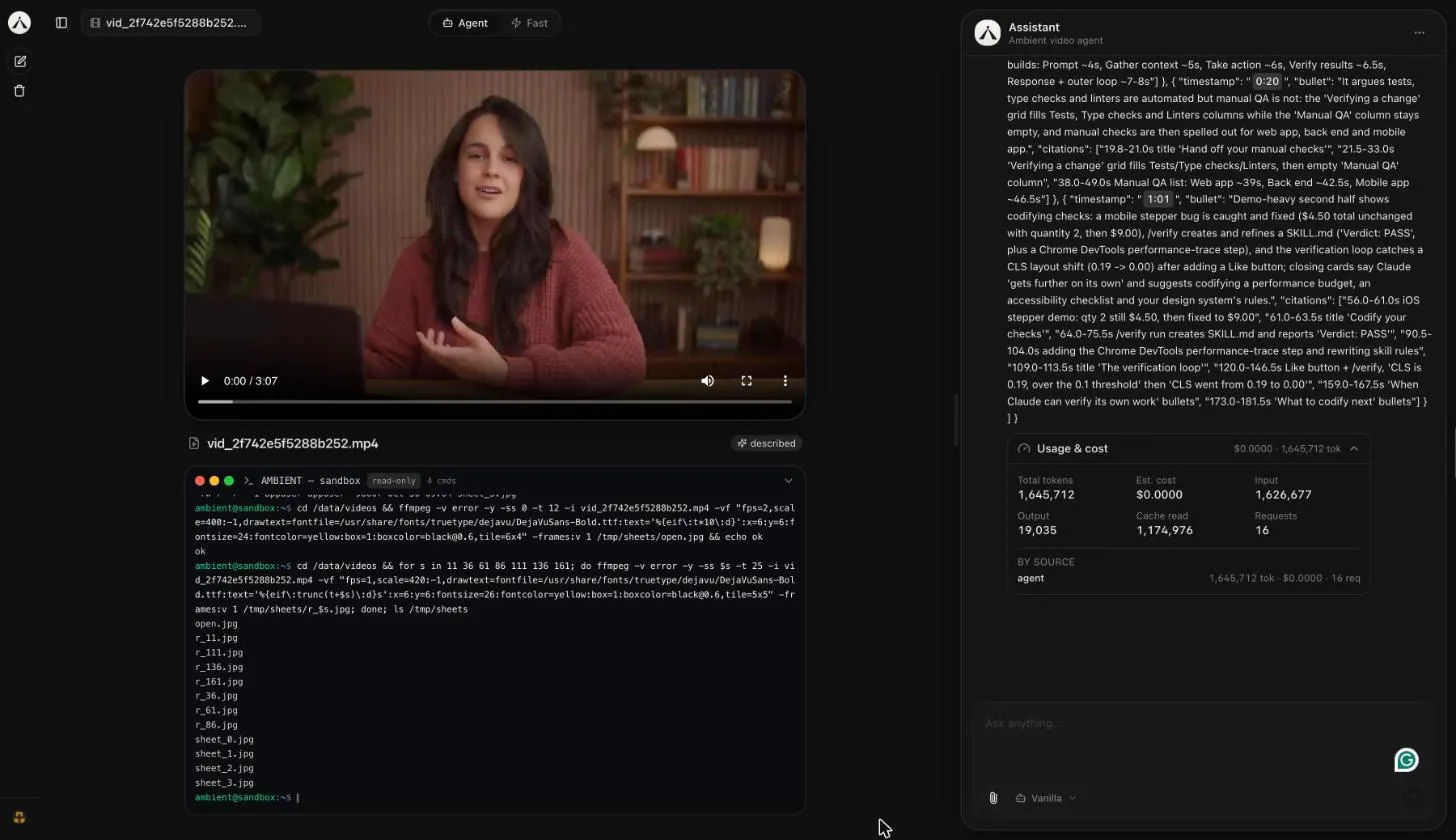
Check what the run cost.
Under the answer, the Usage & cost bar shows the estimated cost and total tokens for the run. Expand it for input, output, and cache-read tokens, the number of model requests, and a By source breakdown.
-
Ask a follow-up.
Type another question in the same chat. Studio reuses the chat’s engine session, so the agent keeps the context of the earlier turns and the same video.
Hover over an answer to copy it or rate it with the thumbs up and thumbs down buttons.
The video library
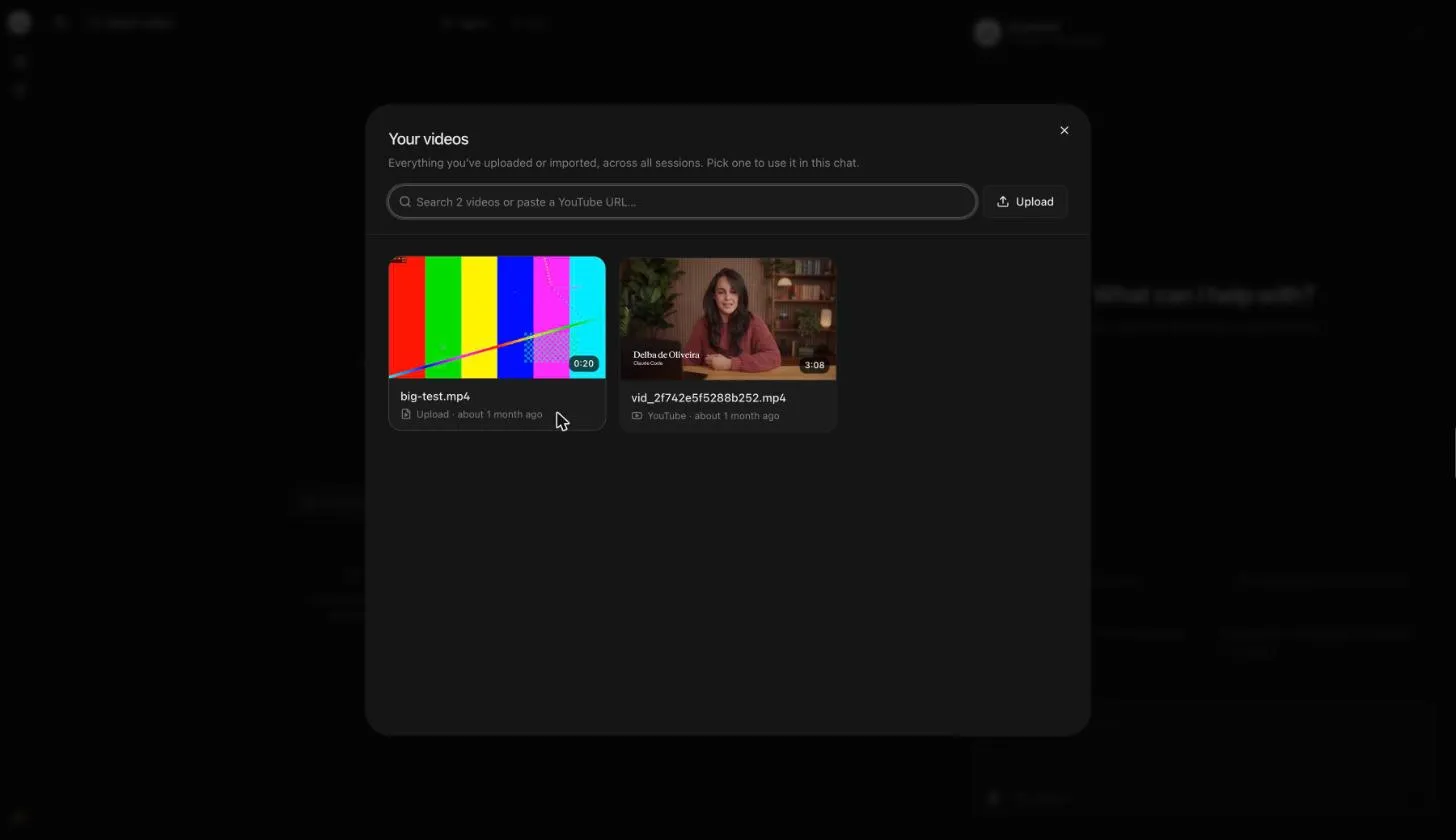
Section titled “The video library”Open the library from Browse files on the empty stage, or from the video picker in the header, which shows the current video’s name (or Select video). The Your videos dialog lists every video in the engine, uploaded or imported, across all chats.
- Each card shows a preview frame, the duration, the source (Upload or YouTube), and when it was added. Hover a card to play a muted preview. The video open in this chat is marked Current.
- Type in the search box to filter by filename.
- Paste a YouTube URL into the same box and click Import video, or press Enter, to import it.
- Click Upload to add a file from your computer.
- Videos that are still importing show Importing…. Failed imports show Import failed and can’t be picked.
Click a card to use that video. A chat stays tied to the video it started with, so when the current chat already has a video, picking or dropping a different one opens a new chat about it.
Agent and Fast modes
Section titled “Agent and Fast modes”The Agent / Fast toggle sits at the top of the stage. Hover over either option to see what it does.
| Mode | How it works | Use it for |
|---|---|---|
| Agent | A multi-step tool loop: the agent searches and focuses on clips and frames before it answers. | Precise questions: timestamps, counts, specific details. |
| Fast | A single dense-frame pass over the whole video, with no tools. | Quick summaries and broad questions. |
Your choice is saved in the browser and applies to the next chat you start. A chat keeps the mode it began with.
The sandbox terminal
Section titled “The sandbox terminal”Under the player, AMBIENT — sandbox mirrors the shell commands the agent runs, such as ffmpeg or ffprobe calls, along with their output, as if you were watching the sandbox shell. It’s read-only: you can watch, but you can’t type into it.
- The title bar shows how many commands have run in this chat.
- Click the title bar to collapse or expand the terminal. Studio remembers your choice.
- The terminal reads from the conversation, so it works live and also when you reopen an old chat.
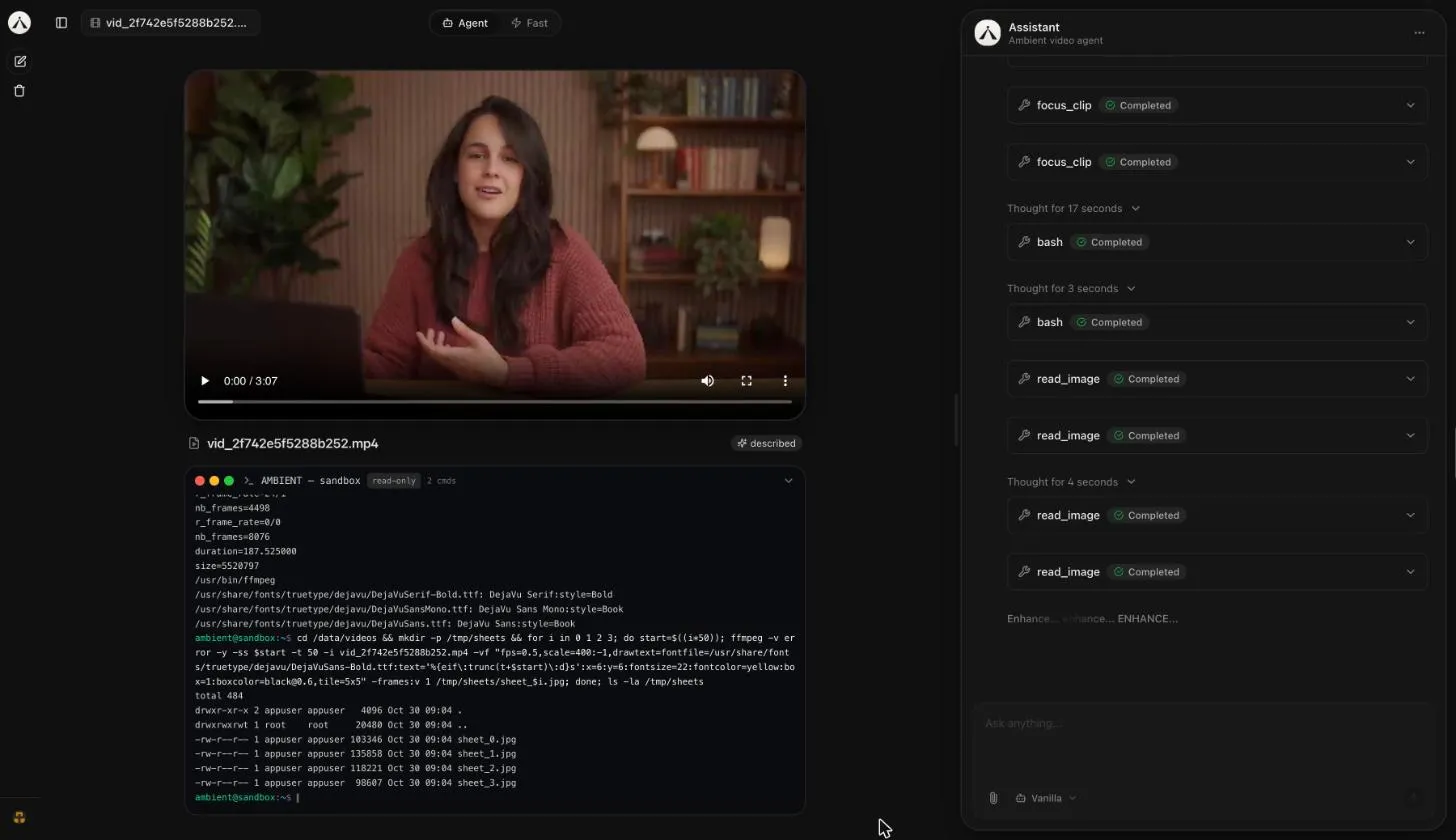
Commands appear only when the engine’s bash tool is turned on. It’s on by default; see the configuration reference.
Chats and history
Section titled “Chats and history”- The sidebar groups your chats under Today, Yesterday, Last 7 days, Last 30 days, and Older. Click one to reopen it with its video and full conversation.
- Each chat has its own URL,
/chat/<id>, so you can bookmark it. - To delete a chat, open its ⋯ menu in the sidebar and choose Delete. To clear everything, click Delete all under New chat.
- Chats belong to your browser’s guest user, so they don’t follow you to another browser. Videos live in the engine and are shared by every chat.
Customize the agent
Section titled “Customize the agent”By default, Studio runs the engine’s built-in agent with the engine’s configured model, endpoint, and system prompt. To try a different model or prompt without touching the engine, create an agent definition.
-
Open Settings. Click the ⋯ button in the Assistant panel’s header and choose Settings, or go to
/settings. -
Under Agents, select Vanilla, the built-in definition with no overrides, and click Duplicate. You can also click New.
-
Fill in the fields you want to change. Leave a field blank to use the engine’s default.
- Name: how the agent shows up in Studio.
- Model id: the model to run, for example
z-ai/glm-5.2. - Base URL: an OpenAI-compatible endpoint, for example
https://openrouter.ai/api/v1. - API key: the key for that endpoint.
- System prompt: instructions that steer how the agent answers.
-
Click Save changes, then Make active.
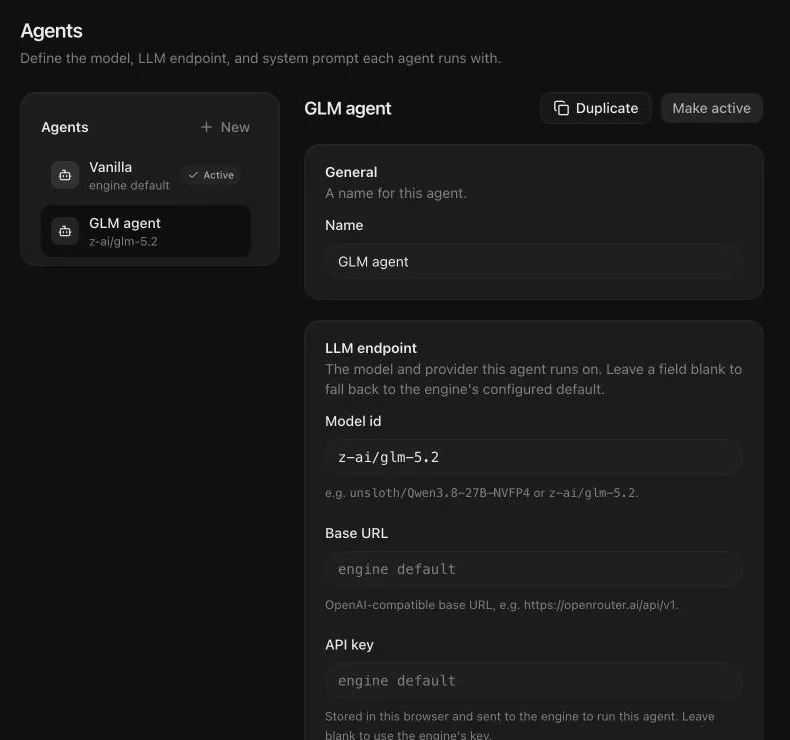
You can also switch agents from the agent picker in the question box’s footer. It lists every definition and links to Manage agents. Like the mode, the active agent applies when a new chat sends its first question.
Settings → About summarizes this: the LLM endpoint is configured on the engine and shared by all agents unless a definition overrides it, and agent definitions are stored in the browser.
Appearance
Section titled “Appearance”- Collapse or expand the sidebar with the panel button at the top left.
- Switch between dark and light mode from the user menu at the bottom of the sidebar (it shows Guest). Studio follows your system theme until you choose.